In the south, central air is in almost every home. And when the AC goes out most people panic, since a new system runs several thousand dollars and takes a few days to have it replaced. I’m not sure which is worst the few days or several thousand dollars…
The good news is that about ninety percent of the time it will be the run capacitor. This is a very inexpensive part. The first time we had this issue it cost $125 for a service call. While I was thrilled it was not $4k for a new AC system. Two years later the capacitor went out again and I thought I would change it myself. I called around to the local HVAC dealers and every one told me there is no way they can sell me the part without a license. I was fortunate to find an DIY appliance store that not only would sell me the part but had it in stock. It was about a 30 mile round trip which I did not mind and the part was $40. I thought that was great and I saved $85. I thought I would check online and have the capacitor on hand next time the AC goes out. I did a search for the model number and as it turns out, Amazon has them by the thousands and mine was $8. Really $8, I just drove 30 miles and paid $40 for the exact same capacitor. I thought it maybe an isolated issue, but over the last month I’ve replaced three other capacitors on three different AC units and the capacitors prices ranged all less than $15 each and the cheapest was only $2.40.
The moral to this story is to get your capacitor model number and order them online, so it would only take a few minutes to get the AC back up and running and cost you very little. Replacing the capacitor is pretty simple and you only need a screwdriver and maybe pliers.
Removing and Replacing the AC Start Capacitor
- TURN OFF AC UNIT BREAKER IN THE MAIN POWER PANEL!
- Disconnect or turn off the power to the AC unit at the outside service panel.
- Once the power is disconnected open the service the panel in the side of the AC unit. There are usually two screws that hold the cover.
- Remove the cover and you will see the capacitor and some wiring.
- Before you touch anything take a few pictures of the wiring configurations.

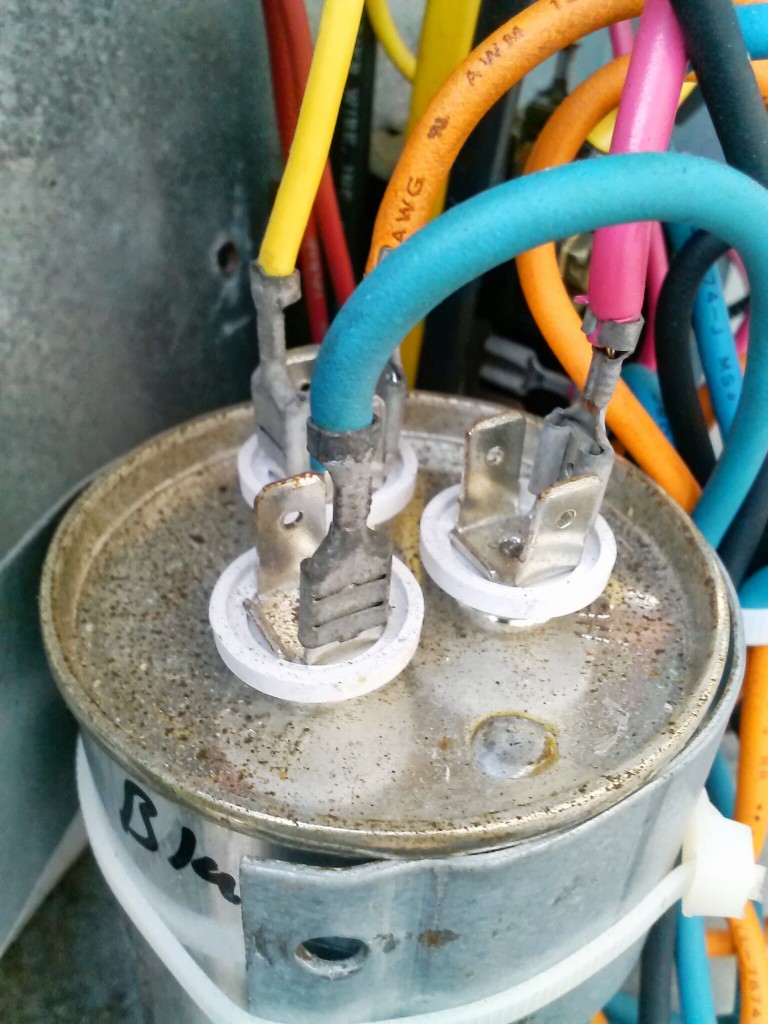
This is my AC capacitor they come in many different sizes and shapes. Take notice of the wire colors which terminal they are connected to. - The next thing and one of the most important is to short out the capacitor. Using an insulated screwdriver making sure you are not touching the screwdriver metal shaft, lay the shaft across the terminals of the capacitor. This will instantly discharge the capacitor.
- Disconnect the wires and remove the capacitor, typically there are one or two screws that hold it in place. To check for a blown capacitor you take it to a local appliance part store and they can test it for you. Many times you will not need to test it as you can look at it a tell if the capacitor has blown. The typical capacitor is round or oval and both have flat tops and bottoms. When a capacitor goes bad it will distort and the top or bottom will start to bulge, in some cases the side will too.
- Once you have the new capacitor, simple plug in the wires and mount the capacitor in the same fashion as the old one. Turn on the the power and enjoy the cold AC.
If you have central AC, I think the best approach is to have your AC capacitor ready before you need to replace it. Type in your capacitor’s model and check if amazon has it.