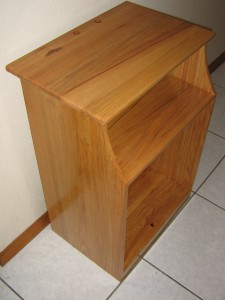
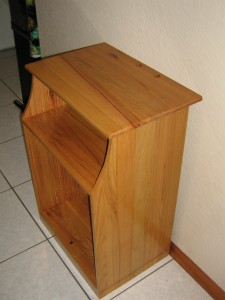
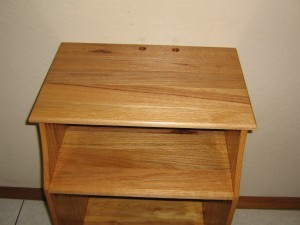
We recently picked up a small 7 gallon bow front fish tank and really had no place to set it up. Last year we reclaimed wood from a local house that was demoed. Since we have a lot of the red oak floor planks I thought that would make a nice stand.

When working with reclaimed wood there is always lots of extra work. The first thing to do is to design your project. This is project is custom built to fit the needs of the fish tank. But the great thing about using reclaimed wood, is that you get to make your own dimensions. Typical the dimensions are based on what you can get out of the wood. So if this plan is does not fit your needs it can easily be changed. To download the sketch it plan Click Here.
The tools we used for the this project is the following:
- Belt Sander
- Planer
- Joiner
- Router
- Palm Sander
- Table saw
- Chop saw
Once you have your design, the first step is to select the wood planks that match. Since the floor had a clear finish this made the selection process much easier.
Next you have to process the wood into usable boards. I thought about just using the tongue and groove to glue the pieces, but the fit was too lose for a stand that was to hold 12 gallons of water. Not something you want to break. So I ripped the tongue and groove off and ended up with oak planks.
We grouped and marked each group of planks for each component of the project. We needed 5 planks for each shelf and both sides and 4 planks for the top. While we had the exact number of planks that would be required, when working with reclaim lumber, always cut extra. Remember that the lumber is all custom made. So if you need to replace a board you would have to go through all the work to make one to fit.
We used the belt sander to remove the old finish and look for nails. We did find 2 nail small finish nails which would really do a number on the planer blades. Once the finish and nails were removed it was time for the planer. If you do not have a planer you can do it all with a belt sander or hand planer. But be forewarned the result will not be as good, unless you are really good with a hand planer. All the boards were planed to 16mm or a little less than 3/4. I use the metric system since it is much easier and more accurate when working with custom prepared wood.
Before you glue up the planks, dry fit them to make sure everything fits and measures a little bigger than needed. I like to have about 5-10% cushion encase there is a nail hole or split in the wood. Next is the joiner another reason to have a little extra, then glue them up. Before you start gluing think about how you will take care of the joints once the boards are glued. I have 13 inch planer and everything calls for 14 to 15 inch widths. So I decided to glue each component in two pieces so I could plane them flat, them glue the two pieces together and only have one glue joint to worry about. So the result is two 8 inch pieces that can easily be planed. Once these are planed it’s time to piece all the wood to it’s final rough size. You are now at the point to actually start the project.
Cut each board to the actual size. Then it’s time for dado and rabbits. Both sides will need to have a dado for each shelf and a rabbit for the back piece at the top. This stand has no nails, so the joinery and glue is all that holds it together. All the vertical stress will be placed on the sides and any horizontal stress will be limited by the back piece.
The top has three glue boards to help support the top when the stand is moved. There is nothing worse then the top popping off when you go to move it.
Once everything is glued and clamped it’s time for sanding. I start of with 120 on the belt sander to remove the glue and any other excess material. Then I move to 120 on the palm sander to smooth everything out. Then finish it off with 220.
Now it’s ready for the finish. I am using clear semi-gloss polyurethane, this will help seal the wood and it will not be too shiny. Remember that this is reclaimed wood with all types of flaws and a high gloss finish would highlight the imperfections.
And the finished solid wood project should last for years. One interesting note is that this floor was installed in the late 70’s. Just thinking about the life of the wood as a floor and now as a fish tank stand gives the project all the more character.

